前端开发离不开富文本,尤其是在后台管理系统开发中更少不了富文本的使用,目前插件市场上有很多富文本框,功能也是万花齐放,今天就简单介绍一个能满足大部分需求的富文本编辑器===》wangeditor富文本编辑器,首先就是它功能能满足日常使用需求,而且也比较简单,接下来简单介绍一下使用方法:
第一步:使用node引入wangeditor富文本编辑器插件
npm install wangeditor
第二步:创建富文本编辑器组件;我们自己在二次封装一下该组件方便使用
a.在组件components内定义文件QuillEditor.vue文件
b.QuillEditor.vue文件代码
<template> <div class="quillEditor"> <Toolbar class="toolbar-style" :editor="editorRef" :defaultConfig="toolbarConfig" :mode="mode" /> <Editor class="editor-style" v-model="valueHtml" :defaultConfig="editorConfig" :mode="mode" @onCreated="handleCreated" @vnode-updated="getData" /> </div></template><script>import '@wangeditor/editor/dist/css/style.css' //引入富文本插件全局样式import { onBeforeUnmount, ref, shallowRef } from 'vue' //引入vue3组件内容import { Editor, Toolbar } from '@wangeditor/editor-for-vue' //引入富文本组件import request from '@/http/request' //引入的全局的请求axios,引入这个主要是在富文本内插入图片以及视频时使用import { ElMessage } from 'element-plus' //消息提示组件,也可以自己定义,主要是错误提示时使用export default {components: { Editor, Toolbar },props: { content: { type: String, default: "" //富文本的内容输入 }},//监听父组件传来的内容,主要是富文本内容回显(注意,这儿传入的内容必须是html格式,不然富文本识别不了)watch: { content: { handler(value) { this.valueHtml = value; }, deep: true, immediate:true }},setup() { // 编辑器实例,必须用 shallowRef const editorRef = shallowRef() // 内容 HTML const valueHtml = ref("") //工具栏配置项,具体配置可去官网查看详细 const toolbarConfig = { } //编辑框配置项 const editorConfig = { placeholder: '请输入正文...', readOnly: false, //设置只读模式 scroll: true, //是否支持滑动 maxLength: 20000, MENU_CONF: {} } //自定义图片上传(这个上传文件接口是我自己写的,上传成功后会返回一个文件地址url作为内容回显) editorConfig.MENU_CONF['uploadImage'] = { async customUpload(file, insertFn) { request("/api/sys/uploadFile","POST",{"file":file},{'Content-Type':'multipart/form-data'}).then(res=>{ if(res.data.status==="ok") { const alt = ""; //图片介绍 const href = ""; //图片链接 insertFn(res.data.data, alt, href) //文件URL回显在富文本内方法 }else { //错误消息提示,可自定 ElMessage({ type: "error", message: res.data.data }) } }) } } //自定义视频上传(这个上传文件接口是我自己写的,上传成功后会返回一个文件地址url作为内容回显) editorConfig.MENU_CONF['uploadVideo'] = { async customUpload(file, insertFn) { request("/api/sys/uploadFile","POST",{"file":file},{'Content-Type':'multipart/form-data'}).then(res=>{ if(res.data.status==="ok") { const poster = ""; //视频封面链接 insertFn(res.data.data, poster) //文件URL回显在富文本内方法 }else { //错误消息提示,可自定 ElMessage({ type: "error", message: res.data.data }) } }) } } // 组件销毁时,也及时销毁编辑器 onBeforeUnmount(() => { const editor = editorRef.value; if (editor == null) return; editor.destroy(); }) const handleCreated = (editor) => { editorRef.value = editor // 记录 editor 实例,重要! } return { editorRef, valueHtml, mode: 'default', // 或 'simple' toolbarConfig, editorConfig, handleCreated };},methods: { //获取数据且向父组件传值 getData() { this.$emit("contentData",this.valueHtml) } }}</script><style lang="scss">.quillEditor { width: 600px; border: 1px solid #ccc !important;.toolbar-style { border-bottom: 1px solid #ccc !important; }.editor-style { height: 400px !important; overflow-y: hidden !important; }}</style>第三步:页面使用;可以直接在要使用页面引入该组件或者全局注册该组件
下面是我直接在页面中引入方法使用:
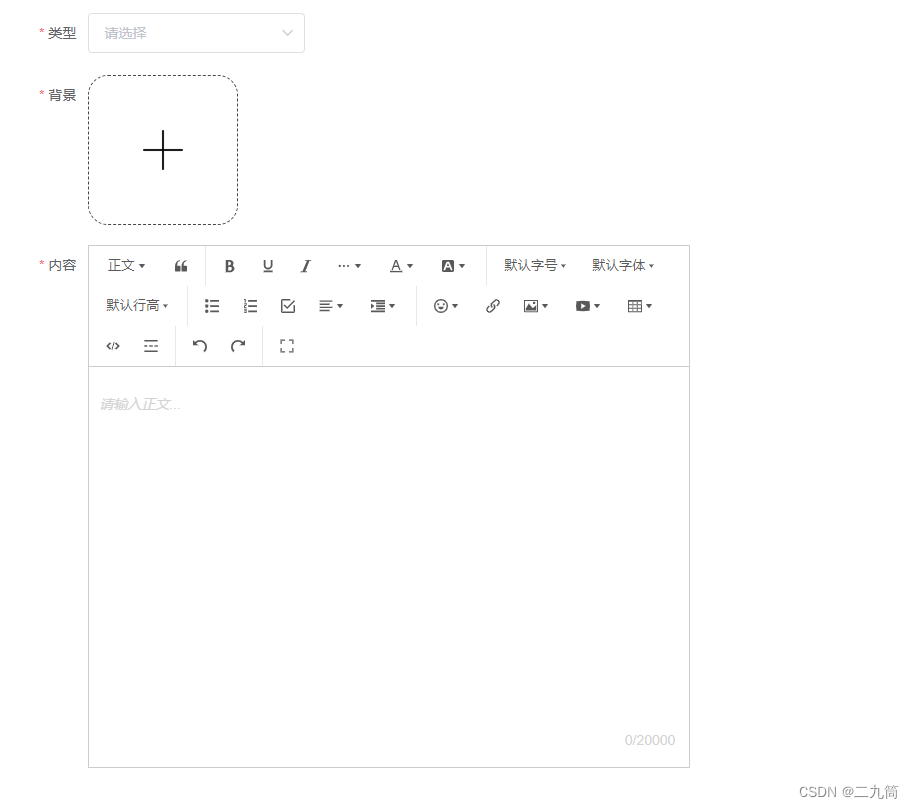
<template> <div> <quillEditor :content="textContent" @contentData="getPrivacyAgreement"/> </div></template><script>import QuillEditor from '@/components/QuillEditor.vue'export default { components: {UploadImg,QuillEditor}, data() { return { textContent: "", //传入子组件回显内容,必须是html格式内容 } },methods: { //富文本内容输出 getPrivacyAgreement(val) { console.log(val) } }}</script>使用效果:
